MonoGame – Tutorial 1 – Fonts

Table of Contents
To get started with making games it’s often a good idea to be able to write out debug messages while you’re working on your game even if that’s just the current FPS. MonoGame doesn’t allow you to use the system fonts on the computer the game is running on you need to provide your own. To achieve this you need to add a font to your game to be used for writing strings to the screen.
Add fonts to your game⌗
To be able to use a TrueType font, MonoGame requires the TrueType font file and a .spritefont file.
- Start the MGCB Editor and open the Content.mgcb file from your project Content folder.
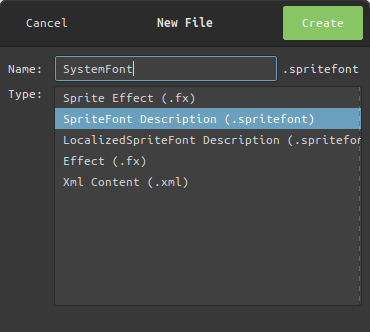
- Create the .spritefont file by right-clicking the Content node in the Project panel then “Add -> New Item…”, then select SpriteFont Description from the list fill in the Name and click Create.
- Open the newly created .spritefont file in VS code, find this line and change it to your selected .ttf font. If the font is installed on the system, just type the name of the font.
<FontName>Arial</FontName>
Code Example⌗
- Open the game1.cs file
- Add a new global variable to hold the font
private SpriteFont systemFont;
- Next, add the following code to the LoadContent() method.
  // TODO: use this.Content to load your game content here
  systemFont = Content.Load<spritefont>("SystemFont");
- and finally, add your text output code to the Draw(GameTime gameTime) method
  // TODO: Add your drawing code here
  _spriteBatch.Begin();
  _spriteBatch.DrawString(systemFont, "Hello World.", new Vector2(100.0f, 100.0f), Color.Green);
  _spriteBatch.End();
  base.Draw(gameTime);
- press F5 to compile and run, job done.
Getting new fonts⌗
If like me you’re using Linux Mint(any Debian based Distro) you can install the Microsoft TTF fonts by running the following from the terminal.
sudo apt-get install ttf-mscorefonts-installer
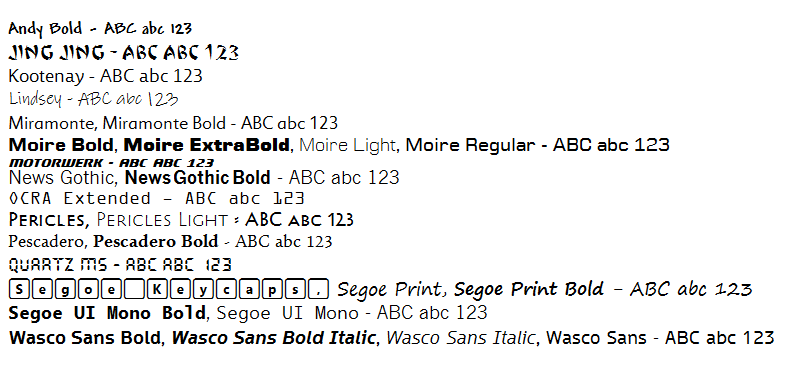
This will give you access to fonts like:-
- Arial
- Times New Roman
- Courier New
- Trebuchet
Another option is to download the Redistributable Font Pack from XNAGameStudio by downloading the zip file from the Archived GitHub site.
Once you download the zip file unarchive the contents of the zip file to your user font folder (~/.local/share/fonts).
when you add new fonts to this folder then it’s a good idea to log out and back in again or refresh your font cache with the command:-
sudo fc-cache -fv
But remember you need to be sure that you are allowed to use a given font in your game, it’s always a good idea to only use fonts that you know have a Creative Commons license that allows commercial use.
If you want to write something on the screen without getting sued? These sites contain, besides other stuff, many free-for-commercial-use fonts (you’ll have to read the licenses though).
You don’t need MGCB Editor⌗
If you don’t like the fact you currently need a windows application to add content to your games in Linux here is an extremely quick overview of how I add spriteFontDescription files to my project without needing to use the MGCB Editor.
- Install the following plugin to VS-Code “File Templates for VSCode&” with the command palette (Ctrl+P), paste the following command, and press enter.
ext install bam.vscode-file-templates
- Download SpriteFont.spritefont Template and save it in ~/.vscode/extensions/bam.vscode-file-templates-{VERSION}/templates
- select User Snippets under File > Preferences (Code > Preferences on macOS), and then type mgcb and select mgcb (MonoGame Content Builder)
- Add the following code segment to the mgcb.json file:-
  "Sprite Font Description": {
    "prefix": "font",
    "body": [
      "#begin ${1:fileName}.spritefont",
      "/importer:FontDescriptionImporter",
      "/processor:FontDescriptionProcessor",
      "/processorParam:PremultiplyAlpha=True",
      "/processorParam:TextureFormat=Compressed",
      "/build:${1:fileName}.spritefont",
      "$0"
    ],
    "description": "A sprite font description block."
  }
- Close any open files.
Now when you want to add a new font to the project.
- Right-click the Content folder and select “New File from Template”.
- Start typing SpriteFont and hit enter to select and type the name of the file.
- Next, open the Content.mgcb file for editing.
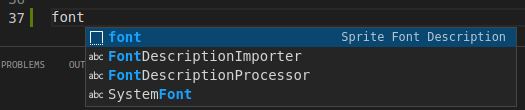
- move to the end of the file and type font when IntelliSense offers you the sprite font description
- hit tab and type the name of the file you just created followed by tab
- you can edit the new font description file as normal.
